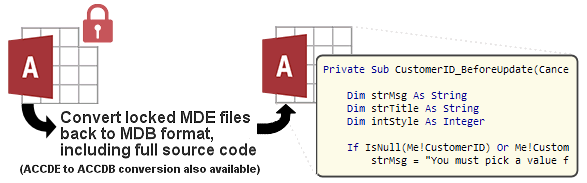
IN THE SPOTLIGHT: MDE to MDB Conversion Service
(also supports: ACCDE to ACCDB, ADE to ADP, etc)
IN THE SPOTLIGHT: Access Database Repair Service
An in-depth repair service for corrupt Microsoft Access files

IN THE SPOTLIGHT: vbWatchdog
VBA error handling just got easier...

" vbWatchdog is off the chart. It solves a long standing problem of how to consolidate error handling into one global location and avoid repetitious code within applications. "
- Joe Anderson,
Microsoft Access MVP
Meet Shady, the vbWatchdog mascot watching over your VBA code →
(courtesy of Crystal Long, Microsoft Access MVP)
IN THE SPOTLIGHT: vbMAPI
An Outlook / MAPI code library for VBA, .NET and C# projects
Get emails out to your customers reliably, and without hassle, every single time.

Use vbMAPI alongside Microsoft Outlook to add professional emailing capabilities to your projects.
IN THE SPOTLIGHT: Code Protector
Standard compilation to MDE/ACCDE format is flawed and reversible.

Provided by allenbrowne.com, December 2004. Updated May 2006.
The Label Wizard matches most mailing labels, but what if you need to divide a page into three slips with address panels in exactly the same place? Most printers require a top and bottom margin, so just dividing the remaining space by three does not place the address panels correctly.
The solution is to add a Group Footer section to act as a spacer between the slips. Set the height of this spacer to the top margin plus the bottom margin. If you can then suppress this footer underneath the third slip, you end up with a page that prints like this:
| Letter | A4 | |
| 0.5" | Top margin | 0.5" |
| 2.666" | Detail (1st mailing slip) | 2.888" |
| 1" | "--------Group Footer (spacer)-------- | 1" |
| 2.666" | Detail (2nd mailing slip) | 2.888" |
| 1" | "--------Group Footer (spacer)-------- | 1" |
| 2.666" | Detail (3rd mailing slip) (Group Footer suppressed) |
2.888" |
| 0.5" | Bottom margin | 0.5" |
| Control Source: | =1 | |
| Running Sum: | Over All | |
| Name: | txtCount | |
| Visible: | No |
The hidden text box accumulates 1 for each record. When the group footer is formatted, it examines the value of the text box less 1. This yields 0 for the first record, 1 for the next, 2 for the next, 3 for the next, and so on.
The Mod operator gives for the remainder after division. Results will be 0, 1, 2, 0, 1, 2, 0, ... Every third record has the value 2, and that is the bottom one on the page. So, if the result is different from 2, we set the group section's Visible property to True. If is is not different from 2, the Visible property is False.
The technique can be easily adapted for other page sizes and numbers of slips.
| Home | Index of tips | Top |
Rate this article: 
This is a cached tutorial, reproduced with permission.
TWINBASIC LTD (Company No. 16590181, VAT No. GB497509439)
Terms | Privacy | Sitemap | X (Twitter)


