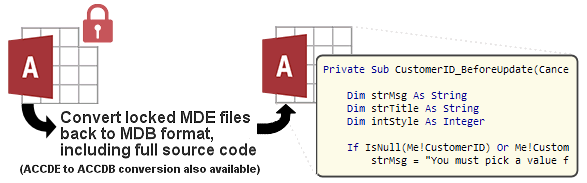
IN THE SPOTLIGHT: MDE to MDB Conversion Service
(also supports: ACCDE to ACCDB, ADE to ADP, etc)
IN THE SPOTLIGHT: Access Database Repair Service
An in-depth repair service for corrupt Microsoft Access files

IN THE SPOTLIGHT: vbWatchdog
VBA error handling just got easier...

" vbWatchdog is off the chart. It solves a long standing problem of how to consolidate error handling into one global location and avoid repetitious code within applications. "
- Joe Anderson,
Microsoft Access MVP
Meet Shady, the vbWatchdog mascot watching over your VBA code →
(courtesy of Crystal Long, Microsoft Access MVP)
IN THE SPOTLIGHT: vbMAPI
An Outlook / MAPI code library for VBA, .NET and C# projects
Get emails out to your customers reliably, and without hassle, every single time.

Use vbMAPI alongside Microsoft Outlook to add professional emailing capabilities to your projects.
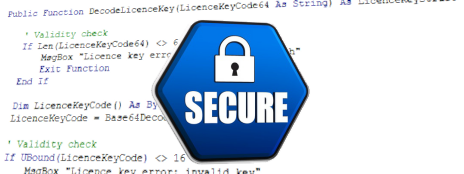
IN THE SPOTLIGHT: Code Protector
Standard compilation to MDE/ACCDE format is flawed and reversible.
vbMAPI is fully supported on the C# platform. vbMAPI provides support for both 32-bit (x86) and 64-bit (x64) builds of your C# application.
Support is provided through using COM Interop to access our Virtual-COM objects, thereby avoiding the need to distribute any DLLs to your end-users.
vbMAPI for C# is provided as a single source file - either vbMAPI.cs or vbMAPI_cs4.cs
Use vbMAPI.cs if you are using Visual Studio 2008 or earlier. Use vbMAPI_cs4.cs if you are using VS 2010 or newer (C#4.0). The vbMAPI_cs4.cs version makes use of optional parameters in the interface definitions, which requires C#4.0.
These files are installed automatically by our installer. The files can be found in the following folder on your machine:
%appdata%\EverythingAccess.com\vbMAPI\C#
PLEASE NOTE: Prior to v1.13.0 (released 17th April 2012) the installation folder was different. Please update to the latest release of vbMAPI to access the folder listed above.
Each single source file provides all the functionality (both 32 bit and 64 bit versions) in one single source file.
vbMAPI objects are not thread-safe and therefore you will run into problems if you try to access vbMAPI objects across multiple .NET threads.
If you really need multi-threaded support, then you must create a completely separate instance of vbMAPI in each thread using the following snippet:
vbMAPI_Session Sess = (new vbMAPI_Instance()).ClassFactory.NewSession();But be careful not to share any vbMAPI objects across threads!
To add vbMAPI to your C# application, open the project in Visual Studio and go to the "Project" > "Add Exisiting Item" menu option. Now, navigate to your %appdata%\EverythingAccess.com\vbMAPI\C# folder and select the vbMAPI.cs source file. The file will now be imported into your project.
Tip: when updating the vbMAPI source module, follow the same procedure as above.
vbMAPI supports running in both 32 bit and 64 bit modes, which is automatically determined based on the CPU setting of your C# application.
Now, here is the important info:.
If vbMAPI is running in 64-bit mode, then your MAPI software also needs to run in 64-bit. Currently the only 64-bit MAPI clients are Outlook 2010 / 2013 / 2016 / 2019 64-bit editions. If you want to target both 32 bit and 64 bit MAPI clients, then you should offer two separate builds of your application (not setting AnyCPU in your project build configuration).
More commonly, you will just want to support 32-bit MAPI clients (since there is only one 64 bit MAPI client to-date), therefore in most circumstances you need to set your project configuration to target the x86 platform ONLY.
Now that you have imported the vbMAPI source module into your project, you can now use vbMAPI in the same general way as the VBA/VB6 version. To get you started, add a button to your form and add the following code:
    vbMAPI_Session      Session;
    vbMAPI_Store        Store;
    vbMAPI_Folder       Folder;
    vbMAPI_FolderItems  FolderItems;
    vbMAPI_MailItem     Item;

    Session = vbMAPI_Init.NewSession();

    Session.LogOn("", "", true, true, 0, false);

    Store = Session.Stores.DefaultStore;

    Folder = Store.GetDefaultFolder(EnumDefaultFolderType.FolderType_Outbox);

    FolderItems = Folder.Items;

    Item = FolderItems.Add(null);

    Item.To_ = "some_email_address@mail.com";
    Item.Subject = "Some Subject";
    Item.HTMLBody.Value = "<b>HTML message here...</b>";

    Item.Send();
For more examples, see the general documentation: QuickStart: The Basics
The differences are between the languages themselves. For example, there are three main differences that you need to be aware of if copying any of the examples from this manual:
TWINBASIC LTD (Company No. 16590181, VAT No. GB497509439)
Terms | Privacy | Sitemap | X (Twitter)

