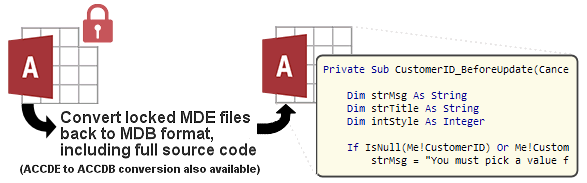
IN THE SPOTLIGHT: MDE to MDB Conversion Service
(also supports: ACCDE to ACCDB, ADE to ADP, etc)
IN THE SPOTLIGHT: Access Database Repair Service
An in-depth repair service for corrupt Microsoft Access files

IN THE SPOTLIGHT: vbWatchdog
VBA error handling just got easier...

" vbWatchdog is off the chart. It solves a long standing problem of how to consolidate error handling into one global location and avoid repetitious code within applications. "
- Joe Anderson,
Microsoft Access MVP
Meet Shady, the vbWatchdog mascot watching over your VBA code →
(courtesy of Crystal Long, Microsoft Access MVP)
IN THE SPOTLIGHT: vbMAPI
An Outlook / MAPI code library for VBA, .NET and C# projects
Get emails out to your customers reliably, and without hassle, every single time.

Use vbMAPI alongside Microsoft Outlook to add professional emailing capabilities to your projects.
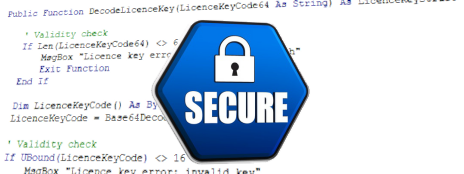
IN THE SPOTLIGHT: Code Protector
Standard compilation to MDE/ACCDE format is flawed and reversible.
provided by Allen Browne, allenbrowne.com. Updated May 2007.
Access cannot log changes to your data at the record level. This article describes one solution for logging inserts, deletions, and edits. The typical multi-user situation is supported, and the code can be called from different forms open at the same time. Limitations of this solution include:
This approach uses a temporary table to log the proposed changes in the form's Delete and BeforeUpdate events. It then moves the proposed change tothe true audit table when the operation is assured in AfterDelConfirm/AfterUpdate. The code consists of four functions, called by the four form events:
The end result is a copy of the record in the audit log, stamped with username, date and time, and type of operation (deletion, insertion, or edit). For deletions, the copy represents the data at the point it was deleted. For new inserts, the log contains the new entry. For edits, two copies are written: one marked "EditFrom" represents the record as it was before the update, and the other marked "EditTo" as is was after. In this way the log always contains redundant data. Combined with the fact that the audit log's AutoNumber should always be sequential, this makes any human tampering with the log more obvious.
Although the code does nothing more than execute a few action queries, you need a good grasp of the Access form events to follow how it works.
Debugging hint: Until you have the code working, remove the single quote at the start of the 2nd line in each procedure. When it fails, you will be able to see which line has not completed. For example, if you have not designed the tables exactly right, the SQL statement will fail.
It is possible for a user to select multiple records for deletion in Continuous or Datasheet view. Access begins a transaction, removes the records, asks the user for confirmation, then commits or rolls back the transaction. The form's Delete event occurs for each record being deleted. At this point you have access to the data, but no idea whether the deletion will be committed. When the form's BeforeDelConfirm event occurs, you no longer have access to the data. The form's AfterDelConfirm event occurs even if the user cancels, with the Status argument indicating whether the deletion was committed or cancelled.
In the form's Delete event, the code below writes a copy of the record to the temp table. In the form's AfterDelConfirm event, these records are copied into the true audit table only if the Status argument provided by Access indicates that the deletion proceeded. The copies in the temp table are then removed.
We use the form's BeforeUpdate and AfterUpdate events for logging edits. There is no guarantee the update will be committed when BeforeUpdate occurs, but the old values are no longer available in AfterUpdate. The code therefore uses BeforeUpdate to record the old values in the temp table, marked "EditFrom". AfterUpdate copies that record to the audit log along with the new values marked "EditTo", and then clears the temp table.
However, if the update fails after the BeforeUpdate code has executed, the AfterUpdate event does not occur. It is therefore possible for the temp table to contain spurious records representing failed edits. Fortunately, a user can edit only a single record in any one form at one time. The code therefore deletes any records in the temp table prior to writing the "EditFrom" copy in BeforeUpdate. If the database is distributed (front-end interface, back-end data), the temp table must be local to the workstation, so the user does not delete other workstations' valid entries in the temp table. Realistically, the time delay between BeforeUpdate and AfterUpdate is minimal, but the local temp table is the safe choice.
If you have other validation code in the form's BeforeUpdate, it makes sense to run that code first, and call AuditEditBegin() only if you do not cancel the update.
BeforeUpdate and AfterUpdate still occur when the user saves a new entry. In this case, we suppress generation of an "EditFrom" entry (since there are no old values), and mark the log entry as "Insert" instead of "EditTo" in the AfterUpdate event. To do this, the form must pass an argument to our code indicating whether this was a new record. That's easy in BeforeUpdate, but by the time AfterUpdate fires, the form's NewRecord property will always be false. The form needs a module level variable set to the value of Me.NewRecord in BeforeUpdate, so as to provide that value again in AfterUpdate.
To create a general module with its functions:
For each table you wish to audit, you will create two more tables, as follows. If your database is split into two mdb files, the table created at step 2 must be in the code mdb (workstation file), and the table at step 5 in the data mdb (server file.)
Field Name Field Type Size audType Text 8 audDate Date/Time audUser Text 40
You are now ready to enter 6 lines of code for your form. Replace the names in the example with the names of the tables and fields of your database, like this:
Where you see Use tblInvoice the name of the table to be audited audTmpInvoice the name of your temp table audInvoice the name of your audit log table InvoiceID the primary key of the table being audited
Steps:
Each edit, insert, or delete will now be logged.
| Home | Index of tips | Top |
Rate this article: 
This is a cached tutorial, reproduced with permission.
Have your say - comment on this article.
What did you think of 'Creating an Audit Trail'?
1. | BlueRover says... | 05 Oct 2010 |
Followed this process carefully through step-by-step, and it works perfectly. I now have an audit system to identify who is changing my tables. Many thanks to Allen Browne. | ||
2. | Zen says... | 25 Dec 2010 |
This is fantastic - works for me too first time on a multi-user split database. As my users can be using any computer, I modified the function so that it records their login name for the access application rather than the network name of the computer. Because the code is written and commented so clearly, this was simple to do. My thanks to Allen Browne. | ||
TWINBASIC LTD (Company No. 16590181, VAT No. GB497509439)
Terms | Privacy | Sitemap | X (Twitter)


